Understanding the Serpentine Belt
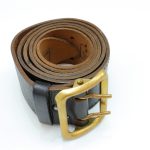
In the realm of SUV maintenance, appreciating the role of the serpentine belt is crucial. This essential vehicle component is responsible for powering multiple systems, including the alternator, power steering pump, and air conditioning compressor. Effectively, it plays a pivotal role in the seamless operation of your SUV’s engine by synchronizing these vital components.
Recognising signs of a failing serpentine belt is important for maintaining a healthy vehicle. Audible cues such as squealing noises while the vehicle is running could suggest wear and tear. Additionally, if you experience issues with the power steering or notice your engine overheating, these could indicate a failing belt. Ignoring these signs may lead to significant damage to your SUV’s essential systems.
Additional reading : Essential Safety Tips for Installing a GPS Tracking System in Your Vehicle
Replacing a worn serpentine belt offers numerous benefits. It ensures the continued performance of your SUV’s various components, which contributes to overall vehicle reliability. Timely serpentine belt replacement can also prevent breakdowns, saving you from unexpected repair costs in the long run. Thus, regular inspection of this vital component should be an integral part of your SUV maintenance routine to promote the longevity and efficiency of your vehicle.
Essential Tools and Materials for Replacement
When tackling a serpentine belt replacement in an SUV, having the right tools at hand transforms a daunting task into a manageable DIY project. Ensure you have these essential tools for serpentine belt replacement:
Have you seen this : Essential Checklist for Evaluating Your Vehicle”s Emergency Braking System Before Hitting the Road
- Socket Set: A complete set in various sizes, as bolts and nuts may vary between SUV models.
- Belt Tensioner Tool: Crucial for releasing tension and removing the old belt.
- Wrench Set: For loosening and tightening components.
For materials, it’s important to choose belt options suited to your SUV model. Consider OEM belts for reliability, but aftermarket alternatives can also offer durability. Additionally, having the correct size is crucial to ensure proper fit and function.
Safety is paramount; equip yourself with necessary safety gear:
- Gloves: Protect against sharp components and improve grip.
- Goggles: Shields eyes from debris or fluid splashes.
- Long-sleeved Shirt: Provides an extra layer of protection during replacement.
Ultimately, having the proper DIY automotive tools and a safety-conscious mindset eases the process, reduces the likelihood of injury, and ensures a successful serpentine belt replacement.
Step-by-Step Replacement Process
Understanding how to undertake the DIY auto repair steps for replacing a serpentine belt is crucial for efficient vehicle maintenance. Having a clear procedure can save time and prevent mishaps.
Preparing Your Workspace
Before you begin, ensure that your workspace is organised and safe. Clear out unnecessary items to prevent tripping hazards. An organised workspace helps maintain focus and ensures you have the right tools on hand, contributing to a smooth serpentine belt replacement process.
Removing the Old Serpentine Belt
Begin by properly detaching any components that obstruct access to the serpentine belt. Familiarise yourself with the belt’s routing before removal. It might be beneficial to take a picture for reference. Use appropriate tools to release tension from the tensioner and carefully slide off the belt. This step is critical to avoid damaging adjacent parts of the vehicle.
Installing the New Serpentine Belt
When installing the new serpentine belt, ensure it follows the correct routing path. Align it with all pulleys and ensure the tension is appropriate using the vehicle’s tensioner system. Double-check the routing and tension to guarantee that vehicle maintenance is done effectively. Proper tension prevents squeaks and belt slipping, ensuring the vehicle’s performance remains unchanged.
Safety Precautions During Replacement
When embarking on a DIY vehicle maintenance task, ensuring adherence to safety precautions is crucial for a smooth experience. One fundamental automotive safety precaution is the disconnection of the car battery before commencing any work. This step not only prevents electrical shocks but also safeguards against any unintended airbag deployment, which can occur if the circuits remain active.
Utilising jacks and stands correctly is paramount. While jacks lift the vehicle, they are not designed to hold weight for extended periods. Hence, once elevated, always secure the car with stands. This measure prevents potential collapses that could lead to serious injuries, especially when working beneath the vehicle.
Additionally, adopting safe handling practices for tools and parts can significantly mitigate risks. By selecting the right tool for each task and using it as intended, you reduce the chance of accidents and damage to vehicle components. Keeping a well-organised workspace can further decrease the likelihood of mishaps, allowing you to focus clearly on the task at hand.
Incorporating these vehicle safety tips into your routine not only enhances personal safety but also ensures the integrity and longevity of your automotive repairs.
Troubleshooting Common Issues
When dealing with troubleshooting serpentine belt installation, it’s crucial to pinpoint potential problems early. A common issue occurs if the belt isn’t aligned correctly, leading to premature wear or failure. Identifying these signs requires careful inspection for uneven belt wear or fraying.
Adjusting Belt Tension and Alignment
Post-installation, adjusting belt tension is paramount. An overly tight or loose belt can result in inefficient performance or damage. Vehicles usually have an automatic tensioner which should be checked to ensure it’s functioning properly. If done manually, the belt tension must be just right—neither too tight nor too slack.
Solutions for Squeaking or Unusual Noises
After installation, you may notice squeaking or unusual noises coming from the engine. This can be indicative of improper belt alignment or tension. Ensuring that the belt tracks correctly over each pulley is essential, as even a slight misalignment can cause significant problems. Use a DIY repair approach with care, only if you’re confident in adjusting and realigning the components.
For those with mechanical expertise, these common vehicle issues can often be addressed with basic tools and patience. However, persistent problems may necessitate consulting with a professional to avert more severe damage.
Common Mistakes and How to Avoid Them
When undertaking a DIY repair on your vehicle, especially replacing a serpentine belt, certain pitfalls are common. One critical mistake often made is over-tightening or under-tightening the belt. Ensuring correct tension is vital, as an over-tightened belt can strain components, while an under-tightened one might slip off.
It’s also essential to avoid ignoring signs of wear or damage on other components. While focusing on the serpentine belt, assess surrounding parts—pulleys and tensioners—which may show signs of aging or damage. Addressing these issues during a repair can prevent future malfunctions.
A common oversight is skipping the troubleshooting steps post-installation. After fitting a new serpentine belt, conduct a thorough check to confirm its alignment and function. Ignoring these steps can lead to a squealing belt, or worse, engine damage.
DIY repair tips can save both time and money, but it’s important to be aware of these common errors. By understanding and addressing these pitfalls, car maintenance becomes a smoother and more rewarding experience. Use these insights to improve your car maintenance skills effectively.
Additional Resources and Maintenance Tips
Understanding SUV maintenance is crucial for optimal vehicle performance. Online platforms offer a plethora of maintenance resources, including instructional videos and diagrams. These serve as visual aids that walk you through procedures such as oil change, brake pad replacement, and tire rotation. For DIY enthusiasts, these resources can be invaluable, guiding each step with precision and clarity.
One often overlooked component is the serpentine belt. It’s essential to adhere to a recommended maintenance schedule for this part of your SUV. Typically, manufacturers suggest inspecting the serpentine belt every 60,000 miles and replacing it if necessary. A worn-out belt can lead to engine overheating or power steering failure, making regular inspection a key upkeep tip.
For those seeking an extended guide, consider delving into further readings on automotive repairs and practices. Books and online articles can expand your knowledge on topics like suspension work and transmission servicing. These resources not only empower you to understand your vehicle better but also ensure you are prepared to tackle unexpected issues, keeping your SUV in top condition.